Best Grating Clip Solutions for Strong and Reliable Fastening
2026-08-30
Ever wondered why some grating installations stay rock-solid for decades while others start rattling after the first heavy load? The secret rarely lies in the grating itself—it's in the clip. If you're searching for the best grating clip solutions for strong and reliable fastening, you already know that cutting corners here can lead to dangerous movement, corrosion, and costly downtime. That's where Sino Grating enters the picture, offering fastening options engineered for real-world abuse. Let's take a closer look at what separates a forgettable clip from one you can trust.
What Keeps a Grating Clip From Slipping When Loads Get Heavy
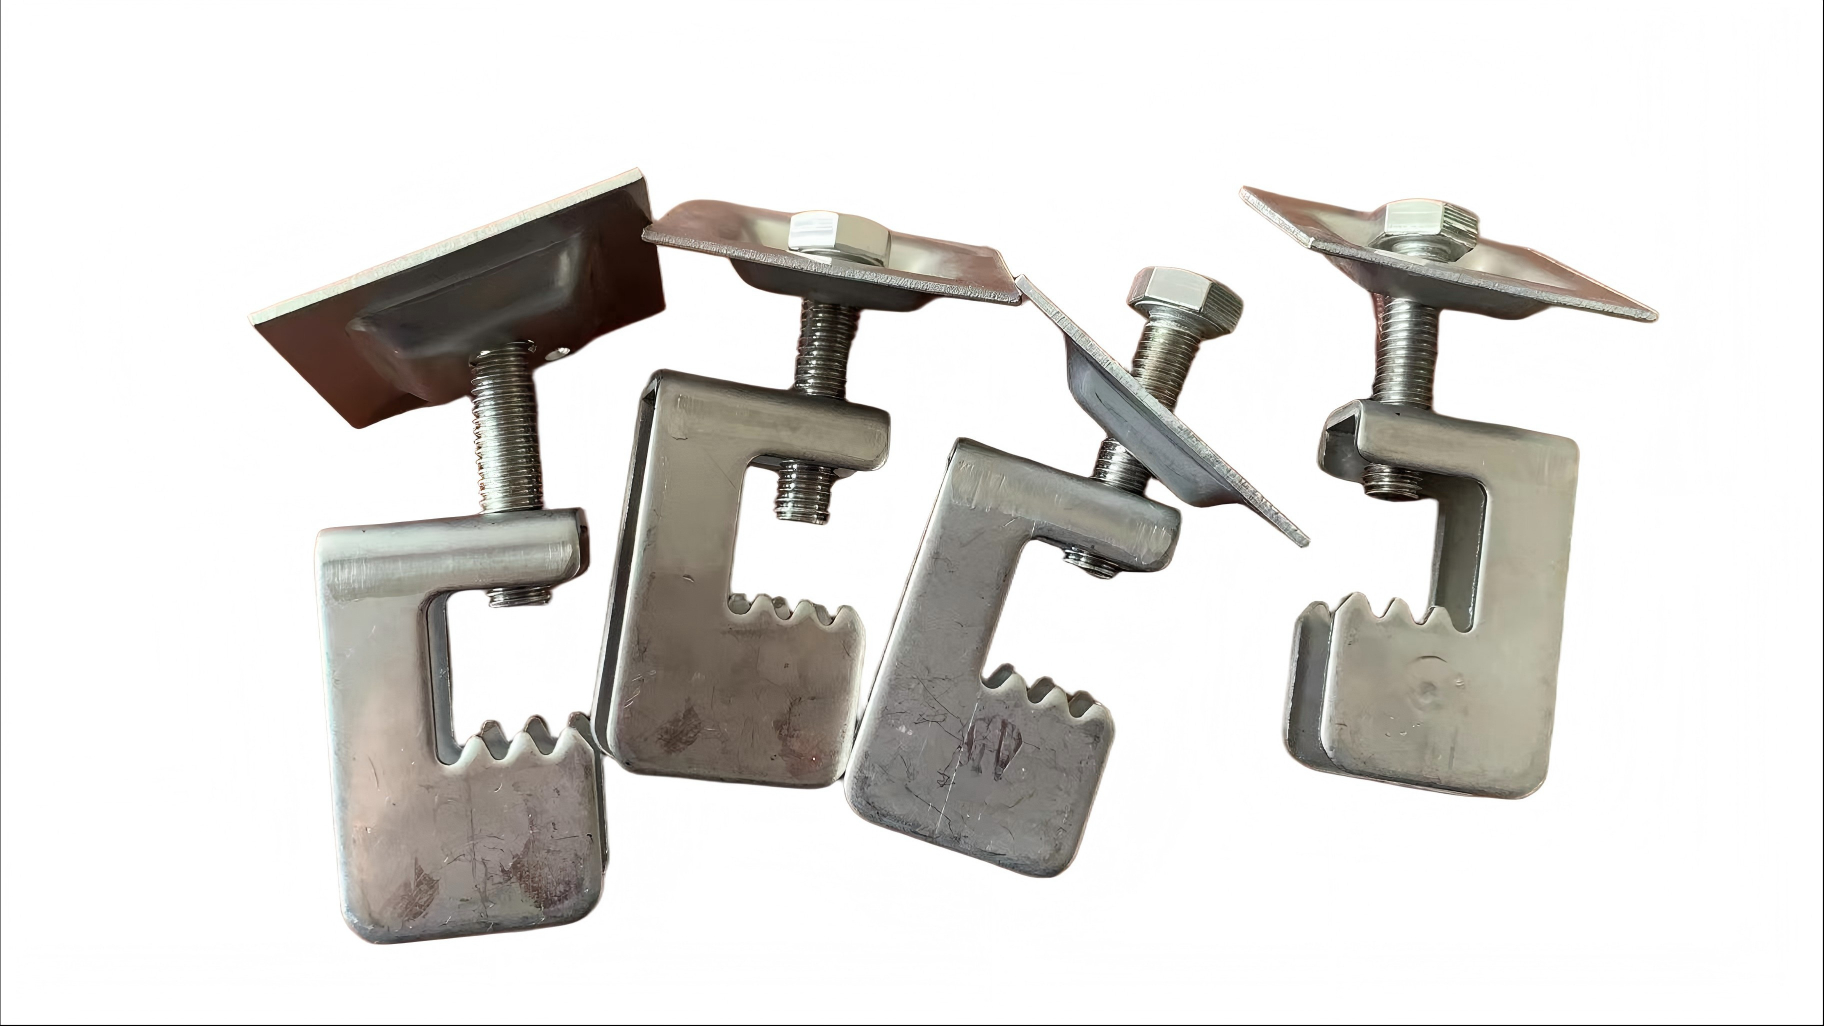
The grip starts with the clip’s geometry, not just the bolt tension. Saddle-style and G-clips wrap around the bearing bar and hook under the support flange, so any sideways push is converted into a direct clamping force against the steel. Serrations or small teeth milled into the contact faces bite into the grating bar, creating a mechanical lock that friction alone cannot match. When the clip is torqued to the manufacturer’s specified range, the fastener stretches slightly and holds that tension, which keeps the teeth engaged even as the grating flexes under traffic.
Heavy cyclic loads tend to loosen ordinary fasteners through vibration, but a properly formed grating clip resists this by distributing the load across a wider bearing area and by using a top plate or saddle that resists rotation. The use of hardened washers and deformed-thread or nylon-patch bolts also helps maintain preload. In field conditions, installers will often see slipping only when the clip is undersized for the bar thickness, when the support surface is painted or rusted smooth, or when the bolt has been over-torqued to the point of yielding. Matching the clip profile to the grating type and rechecking torque after the first load cycle are the practical steps that keep everything in place.
Galvanized vs. Stainless: A Field Guide to Clip Longevity
If you've ever pulled a rusted carabiner off a salt-crusted dock line, you already know the core difference: galvanized steel relies on a sacrificial zinc layer, while stainless steel gets its resistance from chromium mixed into the alloy itself. Scratch a galvanized clip and the exposed steel starts corroding almost immediately in wet conditions. Scratch 304 stainless and it usually forms a new oxide skin and keeps going—unless you're in chloride-heavy water, where 316 is the safer bet.
The real enemy isn't just rain or spray; it's the tiny crevices where moisture sits and oxygen runs low. Galvanized hardware often fails at the hinge or spring first, because that's where the coating gets worn thin and rust creeps under the edges. Stainless clips can suffer pitting in those same areas if they're a low-nickel grade or if they've been worked hard enough to crack the passive layer. In practical terms, a galvanized snap hook on a beachfront property might start looking rough in a season or two, while a decent stainless one will still function after a decade, even if the finish dulls.
For inland, low-moisture uses, galvanized is often enough and much cheaper. But once you're near coastal air, road de-icing salts, or industrial runoff, the extra cost of 316 stainless pays for itself in avoided replacements. A quick field check: if you see rust staining on the zinc, it's cosmetic but warning you the base steel is next. If a stainless clip shows brown freckles, it's usually surface contamination or a low-grade alloy—wipe it with a passivating solution, and if the spots return, swap it out before the load-bearing parts weaken.
Installation Habits That Quietly Weaken Fastening Systems
Over-tightening is one of the most common yet overlooked habits during installation. Many technicians assume that extra torque equals extra security, but this often leads to stretched bolts, damaged threads, or even hidden cracks in the fastened components. The result is a joint that appears solid at first but fails prematurely under normal loads because the fastener's elastic limit has been exceeded.
Another habit that quietly undermines fastening systems is the casual use of impact wrenches without calibrated torque sticks or follow-up torque checks. The rapid hammering can easily drive a fastener beyond its specified torque, especially on softer materials like aluminum. Even when a bolt seems tight, the uneven clamping force can cause gasket leaks, warped flanges, or loosening over time due to vibration.
Skipping thread preparation is a less obvious but equally damaging routine. Reusing dirty or corroded bolts without chasing the threads or applying proper lubrication leads to inaccurate torque readings and uneven clamp load. Installers often wipe a bolt quickly and reuse it, unaware that the friction variation between dry and lubricated threads can shift the actual preload by thirty percent or more, leaving the joint either too loose or over-stressed.
Why Walkway and Platform Clips Need Different Profiles
Walkway clips are pressed against flat, narrow load bars, so their profiles stay low and wide to spread clamping force across a thin edge. Platform clips, by contrast, wrap around deeper beams and need taller side walls to resist the rocking motion that comes from concentrated loads.
The bite geometry changes too. On a walkway, the clip's teeth or lips engage the underside of a grate bar, where vibration and foot traffic try to slide the panel sideways. On a platform, the main threat is downward deflection, so the profile often includes a back rib or a heavier throat that keeps the clip from opening up under static equipment weight.
Installation tolerances push the shapes further apart. Walkways usually follow long, straight runs and allow a slim, uniform clip that can be ganged along a rail. Platforms are more likely to have uneven beam flanges, slight slopes, or welded joints, so their clips need a more forgiving entry radius or an adjustable jaw profile to avoid point loading.
Spotting Fatigue Before Your Grating Starts to Rattle
Catching fatigue before it turns into a rattling mess means paying attention to the signals your equipment gives off long before it fails. Look for hairline fractures around the weld points or where the grating bars meet the frame—these tiny cracks often start at stress concentrations and only become visible under good lighting. A quick visual sweep during routine checks can reveal discoloration or slight deformations that hint at metal weakening under repeated loads.
Another early warning lives in the way the grating responds to foot traffic or machinery vibration. If a section feels spongy underfoot, or if you notice a faint, high-pitched ping instead of a solid thud when weight hits the surface, the load-bearing members may already be losing stiffness. Compare the sound and flex across different areas; a healthy span should feel uniformly rigid, while a fatigued one will often flex more near mid-span or around cutouts.
Don’t wait for an audible rattle to take action, because by then the damage has usually spread beyond a simple patch job. Keep a simple log of inspection dates and note any changes in appearance, sound, or feel—even small shifts can indicate progressive fatigue. Swapping out a suspect panel or reinforcing the connection points early costs far less than dealing with a sudden failure during peak operations, and it keeps the whole walkway safer for everyone relying on it.
Simple Retrofits for Older Grating Without Replacing Panels
Older grating often suffers from surface wear, missing serrations, and loose bearing bars. Instead of full replacement, targeted retrofits can restore both safety and function. A common approach is applying a high-friction epoxy coating or adhesive-backed anti-slip strips directly onto existing panels. For areas where the original serrations have worn smooth, a metal-filled epoxy troweled to a rough profile can recreate traction without altering the panel's load capacity.
Loose or rattling panels are another frequent issue. Simple retrofit fasteners—such as saddle clips, hold-down clamps, or twist-lock devices—can be installed through existing holes or around bearing bars to eliminate movement. For corroded edges near supports, adding a galvanized or stainless steel wear plate under the panel ends shifts the bearing point to a fresh surface and prevents further erosion of the grating itself.
In spots with localized damage, weld overlay repairs can fill pitted or cracked sections without removing the whole panel. A certified welder can build up worn bars with matching material, then re-cut serrations by hand using a cutting wheel. This approach works well when damage is limited to a few bars, and it avoids the downtime and cost of sourcing full replacement panels.
FAQ
Look for clips made from stainless steel or galvanized steel, as they resist corrosion and hold up under vibration. The design matters too—saddle-style clips with a locking bolt tend to distribute pressure across the grating bar instead of concentrating it at one point, which prevents loosening over time.
Saddle clips are usually the go-to when you need a tight, rigid hold because they wrap around the bearing bar and get bolted down. G-clips can be faster to install and work well for lighter loads or where you might need to remove panels frequently. Match the clip to how often the grating gets walked on or driven over.
Not always. In wet or chemical-heavy areas, plain steel clips will rust and weaken. You want 316 stainless steel or hot-dip galvanized clips, and the fastener should match—otherwise you'll get galvanic corrosion where the bolt and clip meet.
Under-torquing the bolts. A clip that feels snug by hand can still allow micro-movement, which leads to rattling and eventual wear on the grating bars. Using a torque wrench and checking the manufacturer's values keeps the whole system from working loose.
Yes, saddle clips with a bottom plate or J-bolt style can clamp around the support flange without drilling. That's especially handy when you're retrofitting existing structures or want to avoid weakening the beam with holes.
It depends on panel size and expected load, but as a rule of thumb, place a clip at each corner and then space additional clips every two to three feet along the perimeter. For heavy traffic or vibration, reduce the spacing and add clips at mid-span points if the panel can flex.
Good ones can, if you leave a small gap between panels and use a clip that allows some lateral movement. Rigid saddle clips might fight expansion and cause buckling, so in outdoor or high-temperature settings, consider slotted or expansion-friendly designs.
Fiberglass grating expands and contracts more than steel, and it's softer, so you need clips with a wider bearing surface and corrosion-resistant hardware. Many manufacturers offer specific fiberglass saddle clips that avoid point loading and prevent cracking around the fastener holes.
Conclusion
A grating clip that holds under heavy load rarely relies on friction alone. The best designs bite into the bearing bar with a saddle or serrated profile, spreading force instead of concentrating it at one edge. Pair that with the right fastener torque and the clip stays put even when walkways flex. Material choice is just as practical: galvanized clips work fine in dry, interior settings, but stainless becomes the smarter spend wherever moisture, salt, or chemical washdowns are routine. It is not simply about rust resistance; it is about avoiding the slow loosening that corrosion-induced pitting can cause. Even the best clip underperforms when installed carelessly. Over-tightening, mismatched drill bits, or setting the clip off-centre against the bar are small habits that quietly reduce clamping force long before anything looks wrong.
Walkway and platform grating may look similar, but their load paths differ enough that a single clip profile cannot serve both well. Heavy-duty platforms often need deeper saddles or wider bearing surfaces, while lighter walkway panels benefit from thinner, more flexible clips that follow thermal movement. Watching for fatigue matters here too. Loose fasteners, hairline cracks at the clip edges, or a rattle that appears only under foot traffic often signal that metal has begun to work against metal. Rather than replacing whole panels, older grating can usually be brought back with simple retrofits: adding saddle clips over worn bearing bars, shimming gaps that allow movement, or replacing only the corroded fasteners. These fixes restore reliable fastening without the cost and downtime of a full panel swap.
Contact Us
Contact Person: Nicholas Zhu
Email: [email protected]
Tel/WhatsApp: 18921275456
Website: https://www.sino-grate.com